| August 14, 2004 | HOME | ||||||||
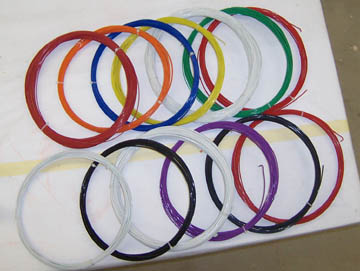
A wire order came in today from Steinair. It really doesn't look like a lot of wire laid out here on my worktable, but I think it will be close to all I will need. Having said that, I must admit I am not considering battery cables (I'll have 2 batteries) or a few heavier primary wires. This is Teflon insulated aircraft wire. I ordered about 700 feet of 22 gauge and various lengths of other gauges (20, 18, 16, 14 and 12) totaling about 1200 feet in all.
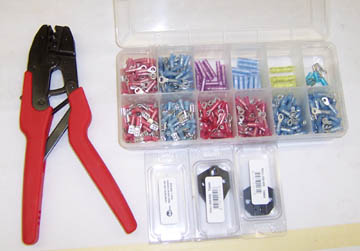
I also ordered this new crimper. It works on almost all the fittings I'll be making, including the computer DB connectors that are used in much of the avionics. I ordered this starter box of connectors because I had no idea where to start with how many of what kind and there was a substantial price break this way.
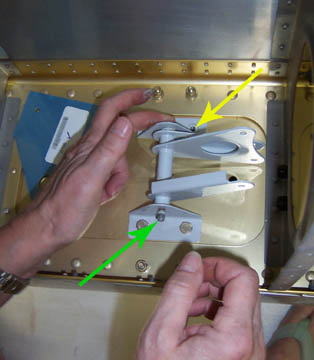
Now, to work. I mounted the left aileron bellcrank. I had to uninstall the upper mounting bracket to get the bolt and bushing through (yellow arrow). All I need to do is torque a nut on the end of the long bolt (green arrow), torque the mounting bolts and this is installed.
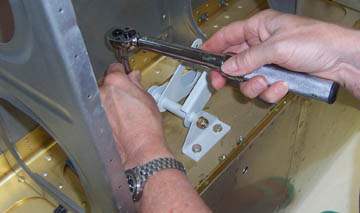
See, I really did torque these.
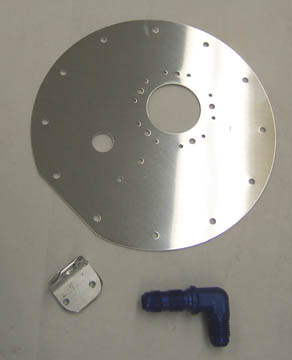
Next, I moved on to fuel tank end plates (T-408). This is the pre-punched blank. It's great to start out with all the holes pre-punched.
|
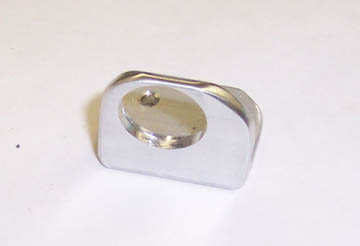
I made no-twist support bracket to hold the 90 degree fitting inside the tank so it doesn't twist when the line is attached to the outside. This was simple a piece of 1 1/4" aluminum angle cut and drilled to 5/8 plus a couple of attachment holes.
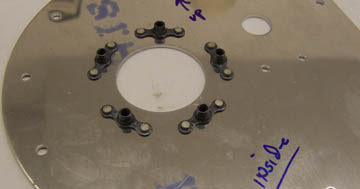
Number 8 nutplates are then riveted to the inside (inside the tank) where the fuel level sensor will attach.
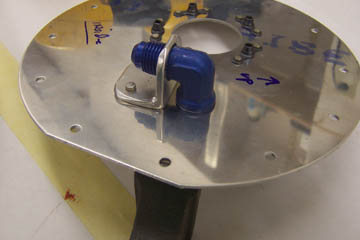
Then I riveted the no-twist bracket to the plate with the fuel fitting in place. I did not tighten the external lock nut because I didn't have any fuel sealant (ProSeal). It will have to wait for that, but I'm sure it needs it.
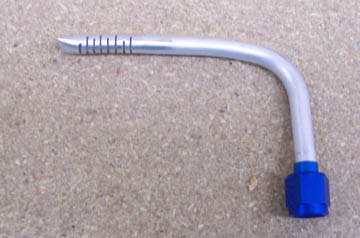
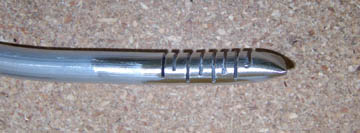
The fuel pickup was easy to make. Just a piece of soft aluminum tubing flared at one end and bent. It's the first time I have used a flaring tool, but it was easy.
Here you can better see how I pinched and cut the end of the pickup tube to better resolve debris in the tank.
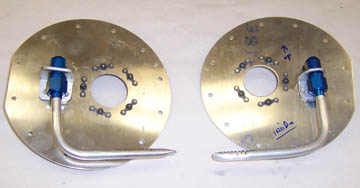
The final products, a left and right completed T-408 tank end plate. Both ready to install. The picture shows the inside of the plates with the fuel pickups. I haven't yet resolved whether I will use the cork gasket material or just ProSeal the things in place.
Previous Day | HOME | Next Day |
||||||||